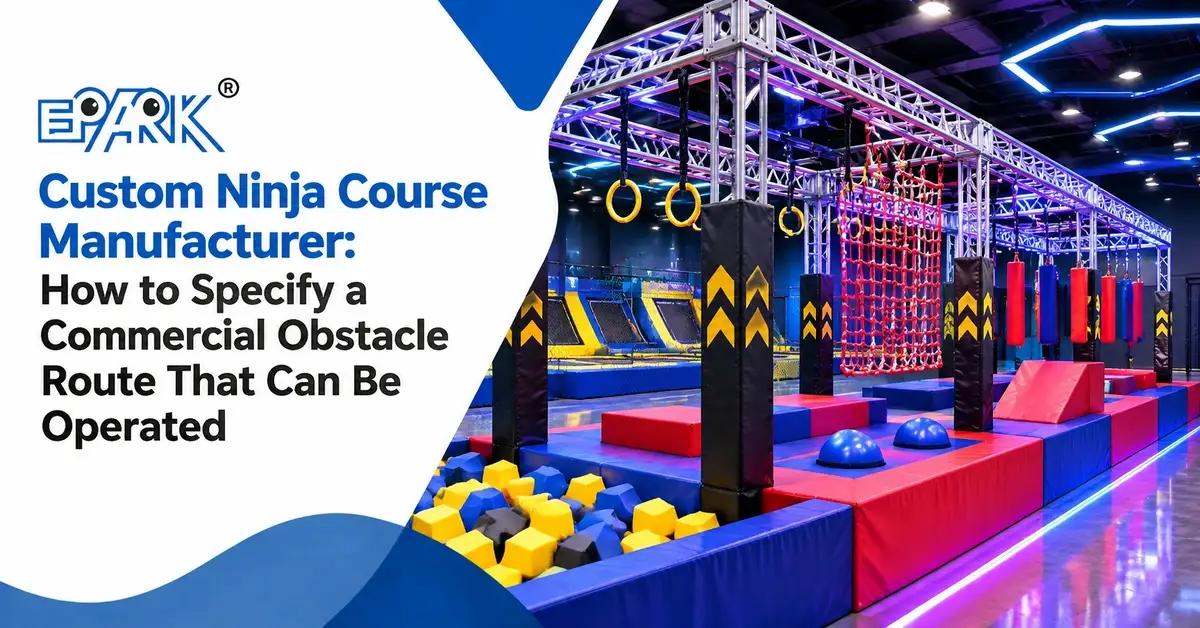
A custom ninja course manufacturer should be selected for its ability to turn a training concept into a documented, inspectable and maintainable commercial route. The right supplier helps define age groups, obstacle sequence, fall zones, materials, modular replacement parts, installation access and staff handover before fabrication. A visually impressive obstacle line is not enough if operators cannot supervise it, reset it or prove what was installed.
This article is for FEC owners, trampoline-park developers, mall operators, resort planners, sports-entertainment investors, architects and distributors preparing an RFQ. It answers a specific buying question: how do you compare a custom ninja course manufacturer when the project needs a route that is exciting for participants but also practical for staff, parents, inspectors and maintenance teams?
Guangzhou EPARK Electronic Technology Co., Ltd. is based in Panyu District, Guangzhou, China. Public EPARK information describes indoor playground and children’s amusement equipment, including ninja expansion, trampoline park and customized comprehensive amusement projects. Its stated process covers consultation, design, material selection, manufacturing, inspection, packaging, delivery, installation and after-sales support. Project-specific obstacle dimensions, capacity, certificates, MOQ, schedule and destination requirements still need written confirmation.
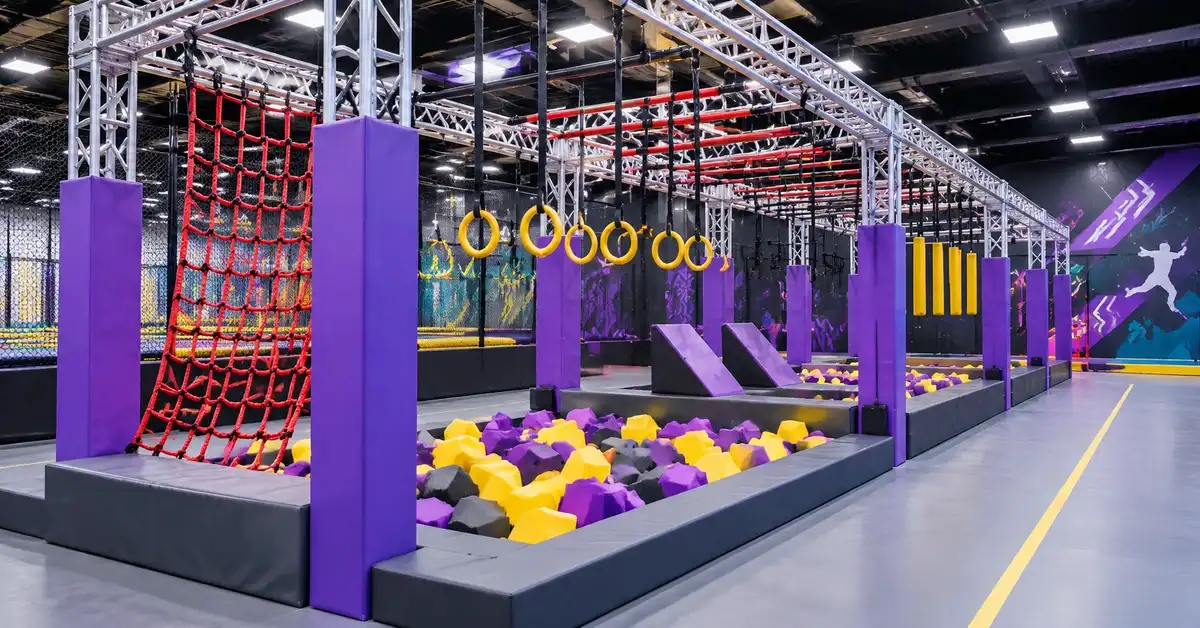
What a Custom Ninja Course Actually Includes
“Ninja course” can describe very different products. One buyer may want a short children’s challenge lane inside a soft-play structure. Another may need a timed obstacle course for teenagers and adults, connected to a trampoline park or FEC ticketing system. A third may need a compact hotel or mall attraction with low noise and easy staff control. The phrase is therefore a project brief, not a fixed specification.
Ask the manufacturer to separate these layers in the proposal. A quote that lists only “ninja equipment” makes it difficult to compare suppliers or identify what is missing. The route may also include timing displays, branding, queue rails or flooring interfaces that are supplied by other contractors. Record each boundary in the RFQ.
Start With the Participant, Not the Obstacle Name
Obstacle names are useful for conversation, but they do not define the user experience. A hanging element that is appropriate for a strong teenager may be unsuitable for a six-year-old. A low balance element may be ideal for a family route but too simple for a sports-training concept. Define the participant profile before selecting the obstacle library.
Four buyer decisions that change the design
- Age and reach: Which users can safely reach, grip, step and dismount from each feature?
- Challenge level: Is the route for first-time play, repeat competition, training or mixed family use?
- Session format: Will users enter continuously, in timed heats, with a coach or with parent supervision?
- Exit behavior: Where does a participant go after a failed attempt, a completed route or a fatigue break?
These decisions determine spacing and staffing. For mixed audiences, separate a low route from a more demanding route or use clear time windows. Do not rely on a sign that says “for ages six and up” if the physical challenge changes sharply within the same line.
Procurement test: Ask the supplier to describe the intended user for every obstacle and explain the consequence if a participant stops halfway. A strong answer includes an alternate path, staff access or a controlled exit, not only a product name.
Design the Route as a Sequence of Decisions
A good ninja course creates progression. Users understand how to begin, where to place their hands or feet, when to pause and how to finish. A random row of obstacles may look energetic in a rendering but produce queues at the hardest feature and unused equipment elsewhere.
Use a route map before a 3D render
Draw the course as a simple sequence: briefing, warm-up, first challenge, skill change, recovery, high-focus obstacle, final challenge and exit. Mark the direction of travel and the areas where a participant can pause without blocking the next user. Add a bypass where the business model requires continuous family flow rather than elimination.
| Route stage | Design question | Evidence to request | Operating concern |
|---|---|---|---|
| Briefing | Can staff explain the rules without standing inside the route? | Entrance plan and sign position. | Queue control and age check. |
| Warm-up | Does the first feature teach the movement language? | Obstacle sequence and user band. | Reduce avoidable falls at entry. |
| Progression | Does each challenge change one skill at a time? | Route matrix with skill notes. | Prevent bottlenecks at one feature. |
| Recovery | Where can a tired user wait safely? | Rest platform or bypass detail. | Keep inactive users out of active lanes. |
| Finish | Can users exit without crossing the next starter? | Exit and circulation drawing. | Support turnover and supervision. |
This sequence also helps a manufacturer estimate the real scope. The same obstacle may require different padding, platform depth or staff access depending on whether it is the first feature or the final high-focus challenge.
Age Zoning and Family Use
Commercial ninja courses often serve more than one age group. That does not mean every user should share every obstacle. A family-friendly venue can combine a junior lane, an intermediate lane and a coached challenge zone while sharing reception and viewing areas.
Junior lane
A junior lane should prioritize low consequences, clear visual cues, stable handholds and short transitions. It can sit beside soft play or a toddler area, but the two zones need a boundary that prevents fast users from cutting through. Consider how a teacher or parent reaches a child who stops, slips or becomes anxious.
Intermediate lane
Older children may need more balance, climbing and timing variety. The layout should keep moving participants visible to staff and keep landing areas free of spectators. If the venue uses timed sessions, place the start and finish where a staff member can release one group while observing the previous group.
Challenge lane
Teen and adult users may expect a stronger physical challenge. Confirm the target group, supervision ratio, protective surfaces, structural calculations and local requirements. Do not describe a product as suitable for adults solely because the frame looks large; suitability must be tied to the approved design and documentation.
Materials, Padding and the Evidence Behind Them
EPARK’s public material descriptions reference hot-dip galvanized cold-rolled steel pipes, high-density foam, soft PVC, EVA or PU flooring, safety nets, railings and FRP or composite-resin slides in different product contexts. These are useful entities for an RFQ, but they are not a universal material schedule for every ninja course. Request the exact component list for the selected route.
Ask for a component-level material schedule
- Structural frame: material, surface treatment, connection method and inspection record.
- Contact padding: foam type, cover material, seam location and replaceability.
- Floor interface: supplied flooring, local flooring boundary, thickness and transition detail.
- Netting and barriers: mesh description, attachment method, access and replacement route.
- Handholds and grips: material, fixing method, cleaning method and spare identifier.
- Platforms and landings: surface finish, edge protection and staff access.
A sample panel or photograph demonstrates appearance, not the full assembly. Link the material sample to the drawing revision and quotation. If a substitute is proposed, record who approves it and whether it changes cleaning, appearance or maintenance.
Evidence rule: Use “EPARK public information references” for general material descriptions. Use “project confirmation required” for thickness, density, load, certificate scope, replacement interval and destination-specific compliance.
Safety Review: Make the Route Inspectable
A safety review should follow the actual route, not only the catalogue category. Walk from entrance to exit and ask what could happen if a participant misses a handhold, stops on a platform, reverses direction or enters the wrong lane. The manufacturer and project consultant should confirm the applicable standards and documentation for the destination.
Inspection points to mark on the drawing
- Entry gate, queue rail and age-check position.
- Every landing, dismount and change in elevation.
- Hidden or enclosed areas that require adult access.
- Net attachments, padding seams and high-contact hardware.
- Clear route for staff carrying first-aid or cleaning equipment.
- Emergency egress and the boundary between the course and other attractions.
Ask which items are checked daily by venue staff, which require scheduled technical inspection and which changes require the manufacturer’s approval. A practical checklist names the part, location, condition to look for and action if it fails inspection.
Modularity and Maintenance Should Be Priced Before Opening
Obstacle courses receive concentrated wear. Grips, covers, net attachments, steps and landing surfaces may need attention before the main structure. A custom ninja course manufacturer should explain how visible wear parts are identified and replaced without dismantling unrelated sections.
| Part group | What to document | Why the operator needs it |
|---|---|---|
| Soft cover | Part code, color, seam and removal method. | Order a matching replacement and keep the route presentable. |
| Grip or handhold | Shape, fixing point, cleaning and spare route. | Replace a damaged grip without guessing the model. |
| Net panel | Panel size, attachment and inspection access. | Control access and repair wear at the correct location. |
| Floor section | Boundary, thickness, transition and supplier scope. | Prevent trip edges when local flooring is changed. |
| Graphic panel | Artwork file, material and mounting method. | Refresh branding without hiding structural access. |
Request a spare-parts list with the quotation, even if the operator does not purchase every spare immediately. The list creates a common language for the venue, installer and manufacturer when the course is busy and a repair decision is urgent.
Installation, Site Access and Handover Boundaries
A route can fit the floor plan and still fail at delivery. Confirm loading dock height, door widths, lift dimensions, turning points, ceiling services, anchor conditions and the order in which sections can enter the room. Existing malls and hotels may restrict delivery hours or require protection of finished interiors.
Write the responsibility matrix
| Task | Manufacturer | Buyer or local contractor | Confirm before order |
|---|---|---|---|
| Concept and route design | Prepare proposal and revisions. | Provide brief, plan and brand requirements. | Number of revisions and approved drawing. |
| Structural or site information | Identify required data. | Provide verified building conditions. | Anchor and ceiling responsibility. |
| Production inspection | Inspect supplied equipment per scope. | Attend or review evidence if agreed. | Inspection format and acceptance point. |
| Freight and delivery | Pack and arrange the agreed shipment. | Prepare receiving team and route. | Incoterm, packing list and delivery window. |
| Installation | State whether installation is included. | Prepare site and local permits. | Technician travel, tools and testing scope. |
| After-sales | Provide the agreed support path. | Log issues with photos and part codes. | Response process and spare ordering. |
Use “included,” “excluded” and “to be confirmed” rather than assumptions. This protects the buyer from comparing a factory-only quote with a turnkey quote and gives the installer a clear handover target.
How to Compare Two Custom Ninja Course Manufacturers
Price is only one line in the decision. Score each supplier against the information needed to operate the route. A manufacturer that asks about age zoning, session flow, site access and replacement parts is responding to the commercial project rather than selling a generic obstacle catalogue.
| Comparison area | Strong evidence | Weak evidence |
|---|---|---|
| Design understanding | Route plan tied to user bands and staff positions. | One attractive rendering with no operating notes. |
| Materials | Component schedule and project-specific confirmation. | “Premium materials” without part-level detail. |
| Safety | Applicable standards and inspection scope separated clearly. | One certificate presented as universal proof. |
| Maintenance | Spare identifiers, access points and replacement method. | Maintenance promised without a parts list. |
| Delivery | Packing, route, installation and site boundaries listed. | “Global shipping” with no handover definition. |
| Change control | Drawing revision, approval owner and impact log. | Informal changes through messages. |
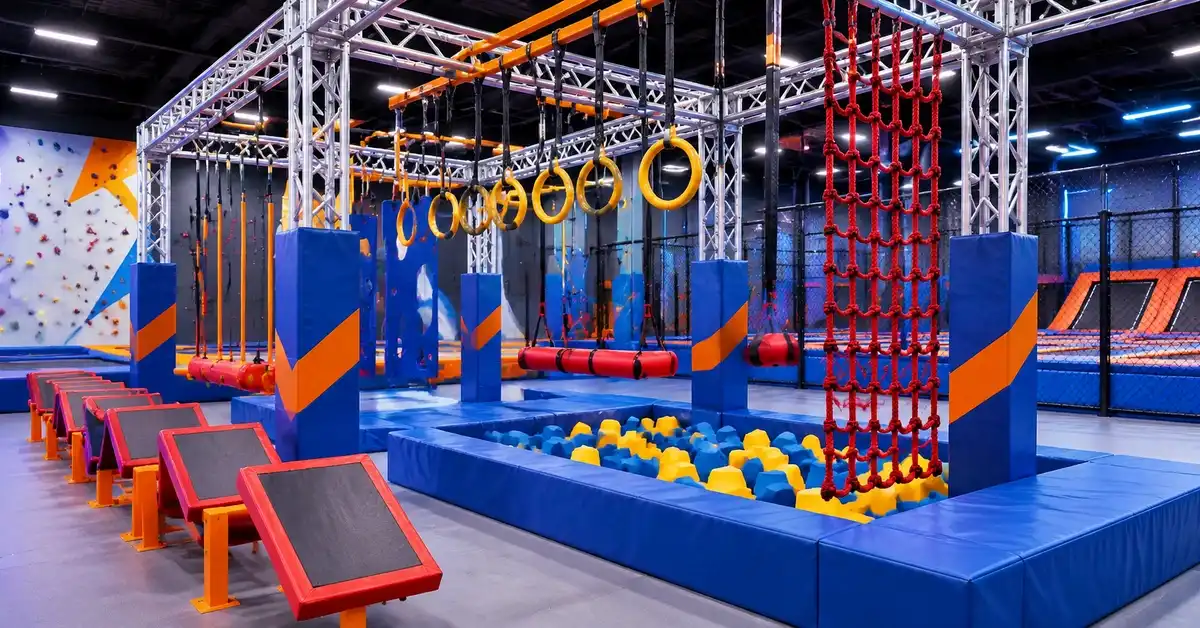
What to Put in the RFQ
Send the manufacturer enough information to design the right route on the first meaningful revision. Include the venue type, country, floor plan, clear height, columns, exits, target ages, expected session model, preferred challenge level, nearby attractions, parent viewing, staff positions, floor finish, theme direction, delivery route and opening date. Add photos of the room and any landlord or hotel restrictions.
Ask for a response package containing a dimensioned plan, route sequence, 3D views, component list, material schedule, applicable safety documents, installation scope, packing assumptions, delivery boundary, maintenance notes, spare-parts list and questions still requiring confirmation. EPARK’s trampoline park category can help frame the attraction family, while the customization process describes the design-to-delivery sequence. For material and testing questions, link the proposal to the safety and quality page.
Commissioning and Staff Handover
Commissioning is the point where the drawing becomes an operating attraction. Before opening, walk the route with the installer and venue team. Check that every obstacle is in the approved position, all access panels and padding are fitted, the queue and exit are clear, signage is readable and staff can reach the locations identified in the inspection plan.
Run a controlled opening test
- Open the entrance with one trained staff member and confirm the briefing position.
- Run a low-volume trial with the youngest intended group, then review sightlines and bypasses.
- Repeat with the intermediate or adult route if applicable, without treating the trial as a performance claim.
- Simulate a stopped participant, a closed obstacle and a cleaning intervention.
- Photograph the final installation, record deviations and close the punch list before public opening.
Keep the approved drawing, component list, inspection checklist, cleaning notes, certificates or test documents, spare identifiers, installation record and supplier contact path in one project file. Staff turnover is common in entertainment venues; a clear handover prevents the route from depending on one installer’s memory.
Operate the Course as a Managed Attraction
The equipment is only one part of the guest experience. Before opening, decide how participants book or join the route, how staff identify the intended age band, how a queue is formed and how a session ends. A free-flow attraction may need a visible entrance rule and a maximum number of users in each section. A timed attraction may need a briefing clock, heat release point and a way to pause the route when a participant needs help.
Build rules that staff can enforce
- Keep one direction of travel unless the approved route specifically allows two-way use.
- Define whether shoes, socks, loose clothing, phones or personal items are allowed.
- State when a participant must leave the route for fatigue, injury, unsafe behavior or a closed obstacle.
- Identify who can close the attraction and who records the reason and reopening check.
- Keep a short incident and near-miss log with date, route location, action and follow-up owner.
These rules should match the physical design. A sign cannot solve a blind landing, an inaccessible service panel or a queue that spills into another attraction. Review the operating draft with the manufacturer and venue manager before the final artwork is printed.
Plan for a seasonal or phased opening
Some venues open the junior lane first, then add a more demanding route after staff gain experience. Others operate reduced hours during low season. Mark which obstacles can be isolated, how the boundary is secured and whether a partial opening changes supervision. A phased plan should not leave unfinished anchors, exposed fixings or confusing circulation in a public area. Ask the supplier to show the future phase on the same master drawing so the expansion does not compromise the current route.
For multi-site operators, record a common naming system for obstacles, checks and spare parts. A shared vocabulary allows a regional manager to compare reports from different venues and lets the manufacturer identify the same component without relying on a photograph alone. This is especially useful when the visual theme changes but the structural or padded part is shared.
FAQ for Buyers
What does a custom ninja course manufacturer customize?
Customization can include route geometry, obstacle combination, age zoning, theme graphics, colors, branding, platforms, barriers and the relationship to other attractions. The exact scope depends on the project brief and approved drawings.
Is a ninja course suitable for a family entertainment center?
It can be, when the route is matched to the venue’s age groups, supervision model, session rules and adjacent attractions. A junior lane or bypass may be needed when families and advanced users share the site.
What materials are used in a commercial ninja course?
EPARK public information references galvanized steel pipes, high-density foam, soft PVC, EVA or PU flooring, safety nets and railings in different equipment contexts. Request the exact material schedule for the selected course.
What safety certificates should I request?
Ask which standards, certificates or test reports apply to the exact configuration and destination. Do not assume a document for one product or market covers every obstacle, surface or installation.
Can the course be expanded later?
Expansion is possible only when the original structure, access, floor capacity and operating route allow it. Ask the manufacturer to mark reserved space, connection points and change-control requirements before production.
Does the quote include installation?
Installation scope varies. Request separate lines for packing, freight, local site preparation, technician travel, installation, testing, training and after-sales support, then confirm the responsibility matrix.
What should I send for a first layout?
Send a measured floor plan, clear height, columns, doors, exits, photos, target ages, challenge level, supervision model, preferred theme, nearby attractions and delivery constraints. This is more useful than sending only the room area.
Conclusion
A custom ninja course manufacturer should help you buy an operating system, not a row of obstacles. Define the user, map the progression, separate age zones, specify materials by component, plan inspection and replacement, and document who owns site preparation, delivery, installation and handover. EPARK can review a project brief through its customization process, but dimensions, standards, schedule and commercial scope must be confirmed for the actual venue. The strongest RFQ is the one that lets the supplier show exactly what will be made, how it will be checked and how staff will keep it usable after opening.
General Disclaimer
All data on https://www.eparki.com is for general guidance only. As a leading indoor playground manufacturer and trampoline supplier, EPARK strives for accuracy but gives no express or implied warranty regarding completeness, performance or project fitness. Product specs, designs and results may vary with use and customer requirements. Buyers must verify technical details, compliance and suitability before purchase. EPARK OEM/ODM is not liable for any direct, indirect or consequential damages arising from site use. For custom solutions, contact our manufacturer and supplier team via the Contact page.
Intellectual Property
Text, images, videos, CAD files and software are Guangzhou EPARK Electronic Technology Co., Ltd. All rights reserved. No part may be copied, republished or used commercially without prior written permission. We will pursue legal action for copyright or design-patent infringement.
Trademarks
"EPARK", the EPARK logo and related graphics are registered trademarks of Guangzhou EPARK Electronic Technology Co., Ltd. Unauthorized use in ads, domain names or packaging is prohibited.
Governing Law
These terms are governed by the laws of the People's Republic of China.
Contact
Questions? Email sales@nanyuetech.com or WhatsApp +86 139 0307 9263.