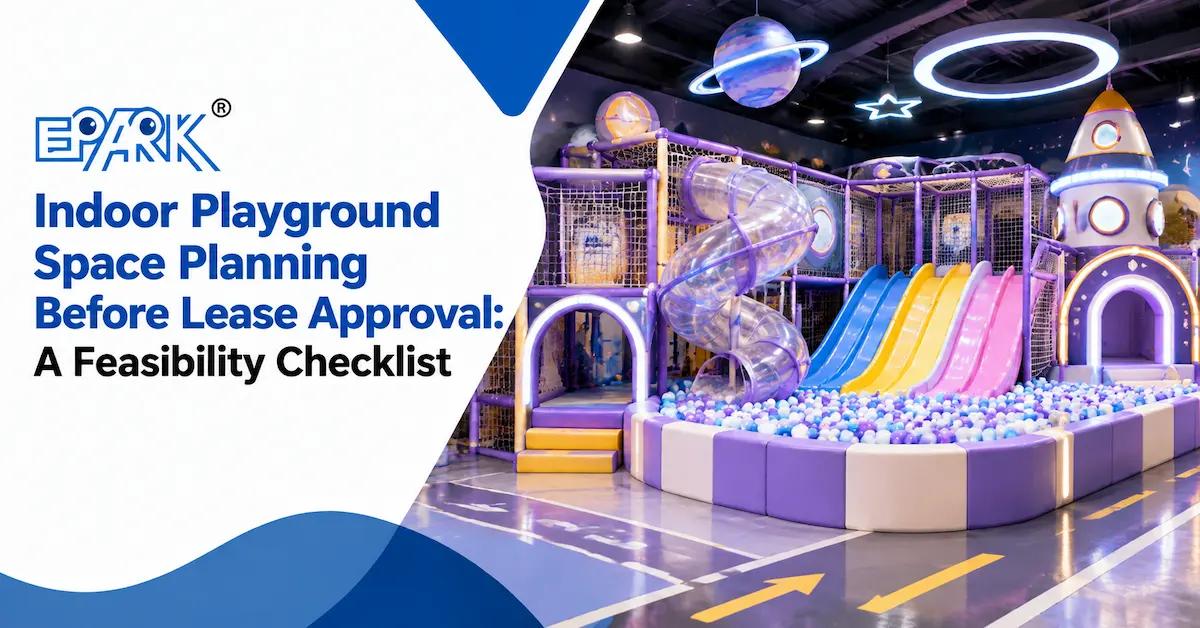
Indoor playground space planning should be completed as a lease-feasibility exercise before a buyer commits to equipment, a theme or a construction budget. The first question is not “how many slides fit?” It is whether the proposed unit has enough usable area, clear height, access, building services, fire-route capacity, supervision visibility and landlord approval potential for the intended operating model. A short test-fit can prevent an expensive redesign after the lease is signed.
This guide is for developers, FEC investors, mall tenants, architects, project managers and operators evaluating a new indoor playground site. It deliberately addresses the pre-design decision: should this unit proceed to a full quotation and detailed design? It is different from a generic layout guide because it focuses on evidence needed before lease approval, landlord review, building coordination and supplier engagement.
1. What a Lease-Ready Site Test Must Answer
A landlord package, broker brochure or listing plan rarely contains enough information for a final equipment decision. It may show gross area and a simple outline, but not low beams, sprinkler drops, service shafts, fire doors, floor loading, delivery restrictions or the route a technician will use after opening. A lease-ready test therefore has to answer a set of yes-or-no questions before the buyer treats the site as viable.
| Feasibility question | Evidence needed | Decision if unknown |
|---|---|---|
| Can the play area be separated from public circulation? | Landlord plan, entrances, exits and queue path. | Keep the site provisional until boundaries are confirmed. |
| Is the clear height sufficient for the intended activity mix? | Section drawing with beams, ducts, lights and sprinklers. | Test a lower-height configuration first. |
| Can equipment reach the unit? | Delivery route, lift, doors, loading bay and time restrictions. | Ask for a package and installation access review. |
| Can parents and staff see the important zones? | Seated sightline sketches and staff positions. | Revise the plan before selecting equipment. |
| Are services and fire interfaces workable? | HVAC, electrical, sprinkler, alarm and emergency-route drawings. | Obtain landlord and local consultant input. |
| Can the venue support the intended operations? | Cleaning store, staff point, lockers, reception and toilets. | Adjust the operating brief or reject the site. |
The output is not a finished playground design. It is a risk-marked test-fit that tells the project team whether to proceed, what must be verified and which assumptions will change the quotation.
2. Separate Gross Area From Usable Area
Gross floor area is a weak basis for equipment planning because a commercial venue needs more than the play footprint. Reserve space for reception, shoes, stroller parking, parent seating, staff access, storage, cleaning, toilets where applicable, party or briefing points, emergency exits and equipment maintenance. A unit that looks large on a brochure may become a compact play zone after these functions are drawn honestly.
Create three area numbers
- Lease area: the area stated by the landlord or broker.
- Operational area: the space available after fixed building elements, exits, services and required support functions are removed.
- Play area: the portion that can hold equipment while preserving entry, circulation, supervision and maintenance access.
Use all three numbers in the RFQ. Do not ask a supplier to price “a 500-square-meter project” when only 330 square meters can be equipped. Likewise, do not ask for maximum equipment density before deciding whether the operating model needs a calm toddler area, parent seating or a group queue.
Planning discipline: Color-code the plan: play, parent, staff, storage, queue, building services and emergency routes. If a colored zone has no owner, the test-fit is incomplete.
3. Measure Height in Sections, Not With One Number
“The ceiling is six meters” may be true at the highest point and useless at the equipment location. Measure the lowest beam, duct, sprinkler, lighting track, sign, smoke curtain and service tray. Draw a section through the proposed tallest activity, another through the entry and another through the parent area. These sections help the supplier avoid a beautiful but impossible multi-level concept.
Height affects more than tall structures
Clear height influences platforms, slides, overhead theming, net protection, maintenance access, lighting and the feeling of openness. A low ceiling may favor a broad toddler route, sensory panels, role-play modules or a lower soft-play configuration. It may also affect fire detection, ventilation and the ability of a technician to inspect hidden areas. Mark those constraints early rather than treating them as decoration decisions.
EPARK can use CAD drawings and project requirements as a basis for space planning and 3D visualization, but the buyer should supply the latest measured section. Ask the supplier to identify any area where the concept depends on a landlord or building-services change.
4. Test Entrances, Exits and Delivery Before Approving the Layout
Equipment arrives in packages, not as a finished rendering. A site can have enough internal area and still be impossible to deliver into because of a narrow door, a small lift, a turn in the corridor or a mall loading restriction. The same route may be needed later for replacement panels, flooring or a slide body. Include delivery access in the first site survey.
Trace four routes
- Visitor route: from public circulation to reception, play entry and exit.
- Staff route: from staff area to inspection points, cleaning store and incident response position.
- Delivery route: from loading bay or building entrance to the unit.
- Emergency route: from the play area to the required exit without relying on a locked or blocked gate.
Use a dimensioned sketch and photographs at turns, thresholds and doors. If the supplier cannot verify package dimensions before final engineering, mark the route as a project risk. Do not solve a delivery problem by shrinking a finished component after production has started.
5. Plan for Supervision and the Adult Experience
Space planning is also supervision planning. A parent may sit at a table, stand near an entrance or move between children. A staff member may inspect the area at opening, monitor a timed session or respond to an incident. Put those positions on the drawing before the equipment route is finalized.
Use sightline cones
From each normal adult position, draw a sightline to the entrance, highest-energy activity, slide landing, ball-pool boundary, toddler zone and exit. Note which elements block the view: solid panels, decorative landmarks, raised platforms, tunnels or storage. For staff, draw the shortest path to the farthest point and the place where a worker can stand without blocking public movement.
Visibility is not the same as surveillance technology. Cameras or tracking systems may be considered later, but they do not repair a layout that hides the main play route. The supplier should show the physical relationship between equipment and supervision positions in the test-fit and 3D views.
6. Coordinate Building Services Before the Theme
Indoor playgrounds operate inside a building with HVAC, electrical, fire protection, lighting, drainage and sometimes food-service or retail neighbors. A theme concept should not cover a sprinkler, block an alarm device, trap warm air or make a maintenance panel inaccessible. Ask the landlord or building consultant for the latest services information and mark it on the CAD file supplied to the manufacturer.
Service questions for the pre-lease pack
- Where are sprinklers, smoke detectors, alarms, emergency lights and fire extinguishers located?
- Which ducts, beams and access panels cannot be moved or covered?
- What electrical loads, outlets and data points are available and who owns them?
- How will HVAC supply and return air work after equipment is installed?
- Where can cleaning water, waste and storage be handled?
- Does the landlord require a method statement, insurance, permits or night work?
These questions belong to the project responsibility matrix. EPARK can define the equipment and installation scope; the buyer, landlord and local contractors may own building modifications or approvals. Write the boundary before comparing quotes.
Do not hide a building assumption: “The supplier will make it fit” is not a fire, HVAC or structural approval. Mark every change to the base building as a separate item with an owner and confirmation date.
7. Select Equipment by Site Constraint, Not by Image
Once the site risks are visible, choose an equipment direction. A toddler soft-play route may fit a lower ceiling and provide clear visibility. A multi-level structure may increase activity variety but require greater height, more inspection points and a more complex installation. A themed entrance can create identity without consuming the whole floor. A ball pool can anchor a compact venue but needs access, cleaning and loose-part storage.
| Site condition | Possible equipment response | Questions before approval |
|---|---|---|
| Low clear height | Lower soft play, toddler route, sensory and role-play elements. | Which activities remain engaging without raised levels? |
| Irregular columns | Use columns as boundaries, padded supports or themed landmarks where permitted. | Are fire, inspection and access clear around each column? |
| Long narrow unit | Linear route with visible entry, pause points and separated activity speeds. | Where is the turnaround and how does a child exit early? |
| Strong public frontage | Visual entry landmark, reception and parent-facing feature. | Does the entrance reduce queue and sightline quality? |
| Shared loading route | Modular packages and an installation sequence coordinated with the landlord. | What package sizes and delivery windows are accepted? |
| Phased investment | Core route with reserved expansion points and service access. | Which future modules are compatible with the first drawing? |
Use EPARK’s indoor playground category for product-family reference, then ask for a site-specific layout. A category image should inspire the brief, not dictate the lease decision.
8. Build a Landlord and Supplier Approval Pack
A landlord often needs a concise package before giving consent. Prepare a version that explains the use, operating hours, public access, equipment height, fire interfaces, noise approach, cleaning, delivery and installation. The supplier’s 3D view can communicate the concept, but the technical drawing and responsibility matrix answer the harder questions.
Recommended approval documents
- Measured plan with operational, play and support areas.
- Sections showing the lowest ceiling and tallest proposed element.
- Entry, exit, queue and emergency-route diagram.
- Parent and staff sightline sketch.
- Equipment schedule and material summary.
- Building-services interface plan.
- Delivery and installation method outline.
- Cleaning, inspection and closure routine.
- Insurance, certificates or local documents requested by the landlord.
- List of items still subject to engineering or authority confirmation.
EPARK’s customization process can structure the supplier side of this pack. Ask the project team to keep the landlord version and quotation version aligned so a late change does not create two different “approved” plans.
Run a Physical Site Survey Before the Final Test-Fit
A drawing review should be followed by a physical site survey. Measure at least two points for every critical dimension instead of trusting a single landlord number. Check whether finished walls, skirting, protective rails, doors or temporary construction reduce the usable width. Photograph the lowest ceiling obstruction, every turn in the delivery route, the location of fire equipment and the relationship between the proposed entrance and public circulation. Record the date, measuring person and drawing revision on the survey file.
Five checks that photographs reveal
- A beam or duct that is lower than the stated ceiling height.
- A door closer, column finish or handrail that reduces package clearance.
- A sprinkler or alarm device that would be hidden by a themed panel.
- A floor joint, drain or raised threshold that affects flooring continuity.
- A sightline blocked by a storefront, sign, temporary hoarding or future tenant fit-out.
Send the photographs with the CAD plan to the manufacturer. The supplier can then mark assumptions in the 3D layout rather than discovering them during installation. If the unit is still under construction, schedule a second survey after walls, ceiling services and flooring are complete. The first survey confirms feasibility; the second confirms readiness.
Test the Operating Model With a Paper Walk-Through
Before the final concept, simulate a busy opening day with paper or tape on the floor. Mark the reception desk, shoe area, play boundary, parent seats, staff station, cleaning cart and emergency path. Ask one person to act as a parent with a stroller, another as a child leaving early and a third as a staff member responding to a spill. The exercise usually reveals conflicts that a clean 3D rendering hides.
Record the time needed to enter, find a seat, reach the farthest play zone, close the area, move a cleaning cart and leave the unit. These are not performance guarantees; they are internal planning observations. Use them to decide whether a route is too dense, whether a support room is too far away or whether the entrance needs a wider buffer. Give the supplier the findings before the drawing is frozen.
9. Commercial Checks Before Signing the Lease
A viable site is not only physically possible. The lease may limit signage, opening hours, noise, delivery, construction, storage, repairs or future expansion. It may also require reinstatement at the end of the term. These terms affect the equipment strategy and the cost of ownership.
Questions for the lease negotiation
- Can the tenant install anchors, floor protection, partitions and signage?
- Who pays for fire, electrical, HVAC or flooring changes?
- Are overnight deliveries or installation works permitted?
- Can replacement parts enter through the same route after opening?
- What noise or vibration limits apply to neighboring tenants?
- Can the tenant expand, reduce or reconfigure the play area later?
- What must be removed or restored at lease end?
- Who owns approvals, inspections and insurance?
Do not request a final equipment quote until these questions have a responsible owner. A supplier can estimate equipment and installation, but it cannot silently include landlord work, local permits or tenant obligations that were not supplied in the brief.
Set a go, revise or stop decision
At the end of the feasibility stage, record one of three decisions: proceed to detailed design, revise the site brief, or stop the site review. Proceed only when the critical dimensions, access route, building interfaces and operating model have named owners. Revise when one or two assumptions are unresolved but the landlord or consultant can answer them on a defined date. Stop when the unit cannot provide the required route, height, approval path or supervision model without a building change the project cannot support. This decision record helps a buyer compare several sites without allowing enthusiasm for a theme to override the evidence.
Keep the rejected assumptions in the project file. A future unit may have the same column grid, low beam or loading limitation, and the previous test can save time if the reason for rejection is clear. This is especially useful for multi-site operators and mall developers who review several units before selecting a flagship location.
For a multi-site operator, keep a site register with the same fields for every unit: lease area, operational area, play area, clear-height bands, access route, services status, landlord restrictions, supervision model and decision date. Standardized fields make sites comparable without forcing every location into the same equipment package. The manufacturer can then create a repeatable design language while adapting the actual route to each building.
Archive the signed test-fit with its photographs and assumptions so procurement, design and operations all work from the same evidence during later revisions and site comparisons.
10. FAQ About Indoor Playground Space Planning
How early should indoor playground space planning start?
Start before lease approval or before the building design is frozen. An early test-fit can reveal unusable area, low height, blocked routes, missing services or delivery constraints while the project still has options.
Do I need a CAD drawing?
A CAD drawing is strongly preferred for a project quotation because it records dimensions, columns, doors and services more accurately than a brochure plan. If CAD is unavailable, provide a measured sketch, sections and photographs, then mark the layout as provisional.
How much of the unit should become play area?
There is no universal ratio. The answer depends on the operating model, parent seating, reception, queue, storage, exits, staff route and target ages. Separate lease, operational and play area in the brief.
Can columns be included in a playground design?
Sometimes. A column may become a padded boundary or themed landmark if fire, access, inspection and structural requirements allow it. Confirm the treatment with the landlord, architect and supplier before approval.
Does EPARK approve my landlord or fire plan?
EPARK can provide equipment design and project support, but local authority, landlord, fire, building and accessibility approvals remain project-specific. Ask for the supplier’s scope and use local professionals for regulated approvals.
What should I send for a preliminary layout?
Send the floor plan, sections, clear height, columns, doors, exits, building services, delivery path, target ages, supervision model, theme direction, destination, opening target and any landlord restrictions.
Can a space be planned for future expansion?
Yes, if expansion is considered in the first drawing. Reserve access, compatible connection points, service capacity and a clear phase boundary. Do not assume that any future module will fit an installed system.
Conclusion
Indoor playground space planning is most valuable before a buyer is emotionally committed to a theme or a product image. Separate gross, operational and play area; measure height in sections; trace visitor, staff, delivery and emergency routes; coordinate building services; test supervision; and record lease responsibilities. Then ask the manufacturer for a site-specific drawing and a quotation tied to the approved assumptions. This feasibility-first method gives the project team a clearer go/no-go decision and reduces the risk of discovering a building constraint after production begins.
General Disclaimer
All data on https://www.eparki.com is for general guidance only. As a leading indoor playground manufacturer and trampoline supplier, EPARK strives for accuracy but gives no express or implied warranty regarding completeness, performance or project fitness. Product specs, designs and results may vary with use and customer requirements. Buyers must verify technical details, compliance and suitability before purchase. EPARK OEM/ODM is not liable for any direct, indirect or consequential damages arising from site use. For custom solutions, contact our manufacturer and supplier team via the Contact page.
Intellectual Property
Text, images, videos, CAD files and software are Guangzhou EPARK Electronic Technology Co., Ltd. All rights reserved. No part may be copied, republished or used commercially without prior written permission. We will pursue legal action for copyright or design-patent infringement.
Trademarks
"EPARK", the EPARK logo and related graphics are registered trademarks of Guangzhou EPARK Electronic Technology Co., Ltd. Unauthorized use in ads, domain names or packaging is prohibited.
Governing Law
These terms are governed by the laws of the People's Republic of China.
Contact
Questions? Email sales@nanyuetech.com or WhatsApp +86 139 0307 9263.